Garena Free Fire: Kalahari

Popular Now
 Garena Free Fire: Kalahari
 Geometry Dash
 PUBG Mobile
 Warframe
 Schedule I
 Call of Duty
 Valorant
 League of Legends
 Grand Theft Auto V
 God of War Ragnarök
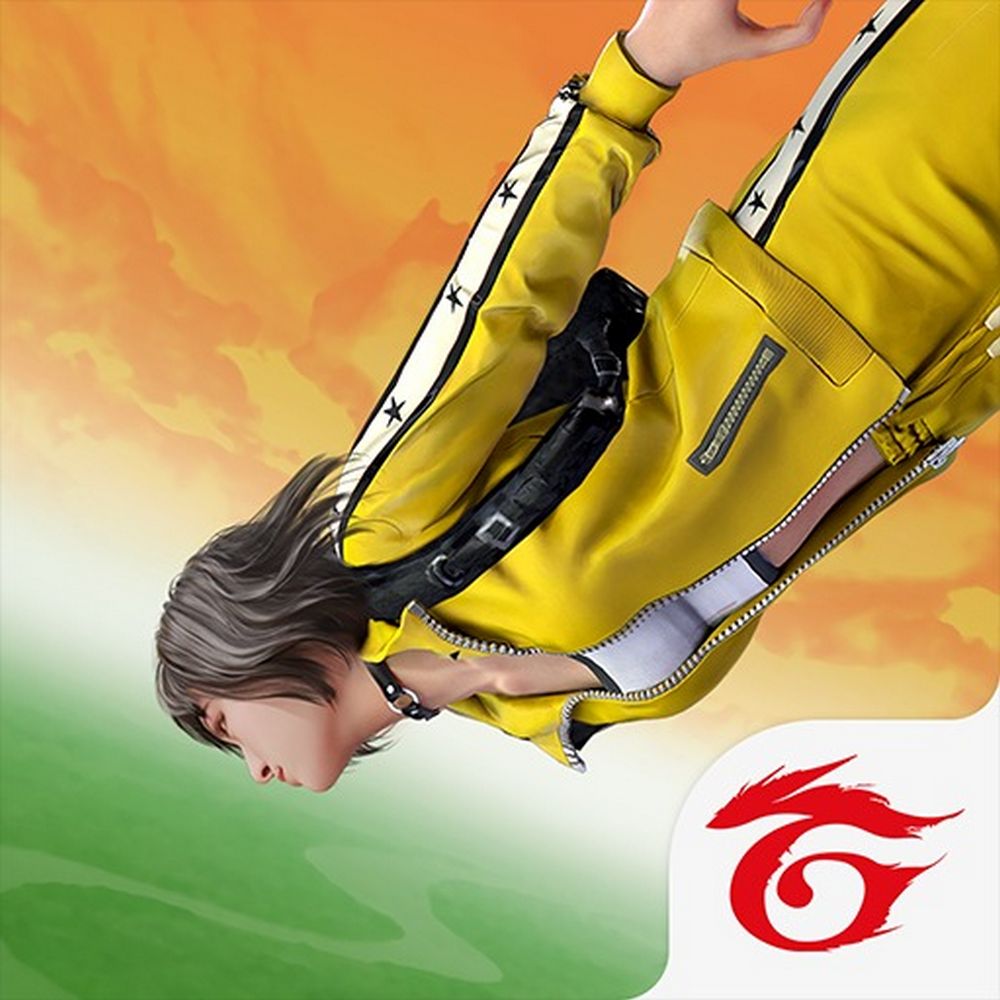
Kalahari Unlocked: Advanced Tactics for Free Fire’s Toughest Map
Forget everything you thought you knew about Free Fire maps. Kalahari isn’t just another sandy arena; it’s a strategic masterpiece, a true test of skill that separates the casual thrill-seeker from the genuine battle royale tactician. While other maps might offer a forgiving learning curve, Kalahari throws you into the deep end, demanding precise movement, calculated risks, and an unparalleled understanding of vertical combat. If you’ve been struggling to conquer its sun-baked peaks and desolate shipwrecks, this guide is your key to unlocking Kalahari’s hidden potential and dominating the battlefield.
The Kalahari Blueprint: Understanding its Tactical DNA
At its core, Kalahari is designed around verticality and choke points, forcing players into more decisive engagements. Unlike the sprawling openness of Bermuda or the varied terrain of Purgatory, Kalahari funnels combat into specific, often elevated, zones.
Key Design Elements and Their Impact:
- Elevated Power Positions: The map is littered with high ground – from the towering Shipwreck to the precipitous Stone Ridge and the multi-layered Submarine. Controlling these elevations isn’t just about getting a good view; it’s about gaining a significant tactical advantage, offering superior firing lines and making enemy pushes incredibly difficult. Recognizing these power positions early and contesting them fiercely is paramount.
- Choke Points and Funnels: Kalahari’s design inherently creates numerous choke points. The narrow passages within the Shipwreck, the valleys between rock formations, and the limited entry points into certain compounds all serve to concentrate engagements. Mastering these areas means understanding when to push, when to hold, and when to rotate to avoid getting trapped. This often leads to intense, unforgiving close-quarters battles.
- Limited Natural Cover: Compared to other maps, Kalahari’s open desert areas offer minimal natural cover. This puts a premium on Gloo Wall usage. Players who can deploy Gloo Walls rapidly and strategically for both offensive pushes and defensive retreats will have a distinct edge. This isn’t a map where you can casually stroll across open ground; every open space is a potential kill zone.
- Loot Distribution and Hot Zones: Kalahari tends to concentrate higher-tier loot in its more contested POIs like the Shipwreck, Command Post, and Submarine. This creates fierce early-game skirmishes as players rush to secure the best gear. Understanding these hot zones and adapting your landing strategy based on the plane path is crucial for a strong start.
Advanced Kalahari Strategies: Outsmarting Your Opponents
Conquering Kalahari requires more than just good aim; it demands a nuanced approach to movement, positioning, and engagement.
- Mastering Vertical Combat:
- High Ground Dominance: Always prioritize gaining and holding high ground. From the top of the Shipwreck, you can rain down fire on approaching enemies. On Stone Ridge, use the elevated ledges to snipe unsuspecting foes below.
- Controlled Descents and Ascents: Learn efficient ways to move up and down levels. Using ziplines, strategically placed stairs, and even well-timed jumps can give you a crucial few seconds advantage. Don’t be predictable; vary your entry and exit points.
- Exploiting Low Ground Weaknesses: When attacking enemies on high ground, focus on breaking their cover with utility grenades or using smoke to obscure your push. Flanking routes are often available to circumvent direct assaults.
- Intelligent Rotations and Zone Awareness:
- Anticipate the Zone: Due to the scarcity of natural cover in open areas, getting caught outside the safe zone can be a death sentence. Always be thinking several steps ahead about where the next zone will pull and plan your rotations early.
- Utilize Choke Points for Ambush: As the zone shrinks, players will be forced through specific choke points. Set up ambushes, deploy traps, and coordinate pushes with your squad to catch enemies off guard as they rotate.
- Vehicle Usage: Vehicles can be incredibly risky in Kalahari’s open areas, making you an easy target. However, they are invaluable for rapid, late-game rotations across wide-open spaces, especially if you need to beat a fast-closing zone. Use them sparingly and with caution.
- Strategic Weapon Loadouts:
- Versatility is Key: While long-range rifles (like ARs and Snipers) are essential for engaging across open areas and from high ground, don’t neglect close-quarters weapons. A shotgun or SMG is indispensable for the fierce fights within the Shipwreck, Submarine, or any confined structure.
- Utility Focus: Carry plenty of Gloo Walls, smoke grenades, and frag grenades. Gloo Walls are your primary defensive tool. Smoke can provide cover for pushes or retreats, and frags are excellent for flushing out entrenched enemies or clearing rooms.
- Communication and Team Synergy:
- Precise Callouts: In a map with so much verticality, clear and precise callouts are vital. Instead of just “enemy there,” specify “enemy on top of Shipwreck, west side” or “two enemies at Submarine, inside.”
- Coordinated Pushes and Flanks: With numerous choke points, uncoordinated pushes often lead to team wipes. Communicate your intentions, synchronize pushes, and work together to flank entrenched enemies. A well-executed pincer movement can dismantle even the strongest defensive positions.
Kalahari in the Competitive Meta: Why Pros Love It
Kalahari remains a darling in competitive Free Fire for a reason. Its unique design fosters high-skill gameplay, rewarding teams that exhibit superior strategic planning, precise execution, and excellent communication. Every win on Kalahari feels earned, a testament to outplaying your opponents not just with aim, but with pure tactical superiority. Garena’s continuous fine-tuning ensures that the map remains balanced and engaging, constantly evolving with the meta. This dynamic environment keeps top players on their toes, always seeking new angles and perfecting their Kalahari game.
Your Next Drop: Conquer the Desert!
Kalahari is more than just a challenge; it’s an opportunity to truly elevate your Free Fire game. By understanding its unique design principles and employing advanced tactics, you can transform frustration into consistent victories. So, gear up, drop into the desert, and start mastering the intricacies of Free Fire’s most demanding battleground. The ultimate triumph awaits those brave enough to truly unlock Kalahari’s secrets.
What’s one advanced tactic you swear by when playing on Kalahari? Share your pro tips below!
Rating
PROS
- There are many different maps to choose from
- There are many different weapons to choose from
- The game is free
- There is a co-op mode
- The game is easy to play.
CONS
- The graphics are not good.